How to virtualize a raspberry pi with virtual box
Get programs and images
download these three items, when finished start with installing Virtualbox with recommended settings. When the installation is finished, start Virtualbox.

 press new to start with creating a virtual machine on your desktop. A virtual machine will emulate a OS on your WindowsOS. You can run beside of raspberry pi OS like ubuntu, linux and even another windows. When you pressed new, you will see a new dialog. In this dialog create a name for your virtual machine. I recommend to use a name which contains the running OS and the purpose of this machine. For example: raspberry_pi_dev or raspberry_pi_test for now. The type is of course a linux machine and the version is a Debian (64-bit), because the rpi image bases on Debian (64-bit).
After you setup these three thing you can press next. This will guide to the next window.

 In the next window you are asked to select the amount of memory your virtual machine wants to have.
The Version 3 of the raspberry pi is shipped with a 1GB (1024MB) RAM setup. So for us its the best choice to select the same amount of RAM to have the most realistic behavior on our virtual machine. In short: Just press next, because 1024 is the pre-selected value.

On the next window you are asked what kind of hard disk you want to have. We want to have a new one, which is pre-selected too. So just press next again.
This screen ask you what kind of type you want to have for your hard disk. We want to have the first one, a VDI. Which is pre-selected again, so just press next again.


Setup your virtualbox
After you started virtualbox you see a an empty
 press new to start with creating a virtual machine on your desktop. A virtual machine will emulate a OS on your WindowsOS. You can run beside of raspberry pi OS like ubuntu, linux and even another windows. When you pressed new, you will see a new dialog. In this dialog create a name for your virtual machine. I recommend to use a name which contains the running OS and the purpose of this machine. For example: raspberry_pi_dev or raspberry_pi_test for now. The type is of course a linux machine and the version is a Debian (64-bit), because the rpi image bases on Debian (64-bit).
After you setup these three thing you can press next. This will guide to the next window.

 In the next window you are asked to select the amount of memory your virtual machine wants to have.
The Version 3 of the raspberry pi is shipped with a 1GB (1024MB) RAM setup. So for us its the best choice to select the same amount of RAM to have the most realistic behavior on our virtual machine. In short: Just press next, because 1024 is the pre-selected value.

On the next window you are asked what kind of hard disk you want to have. We want to have a new one, which is pre-selected too. So just press next again.
This screen ask you what kind of type you want to have for your hard disk. We want to have the first one, a VDI. Which is pre-selected again, so just press next again.

The storage on physical hard disk. The VDI, which we have selected in the screen before will create a file in on of your folders (where we can specify the location of this file is in the next step). This file will have the size of your chosen hard disk size, which we will specify in the next window. But if the space in our virtual machine isn't enough, you can choose to automatically increase the size. Just by selecting "Dynamically allocated". Press next for the next step.

This is the last screen for creating a virtual machine. Here we can specify a folder where the hard disk file will be created and which size we want to have.
I choose 16GB which is compareable to a sd-card.
Specify the location and press create to finish the creation.
I choose 16GB which is compareable to a sd-card.
Specify the location and press create to finish the creation.
Install the raspberry pi image
After you have created your vm, the vm should be visible in the list of your vm on the left-hand side in virtualbox. Start the vm with a double click.

On the next screen choose:
"Graphical Install"
You have to navigate with your arrow-keys on your keyboard, press enter if you found the option.


navigate to your image, which you have downloaded in the first step. double click the image and choose start.
After that, the image will load the pi os. you can use the pi os out of the box with some restriction. We want to install the raspberry pi! So we have 10 seconds time to choose what we want to have.On the next screen choose:
"Graphical Install"
You have to navigate with your arrow-keys on your keyboard, press enter if you found the option.

after pressing enter. It takes a while until you see the next screen, where we can select the language of our raspberry pi. I choose English, you can choose whatever you want. press enter again. The installation will start. This part will take a few seconds. For the next four screens press continue.


!!! ATTENTION AFTER THIS SCREEN YOU HAVE TO DO SOMETHING !!!

press yes, because you want to apply this changes and then press continue. The next steps will take a while again. so we have to wait.
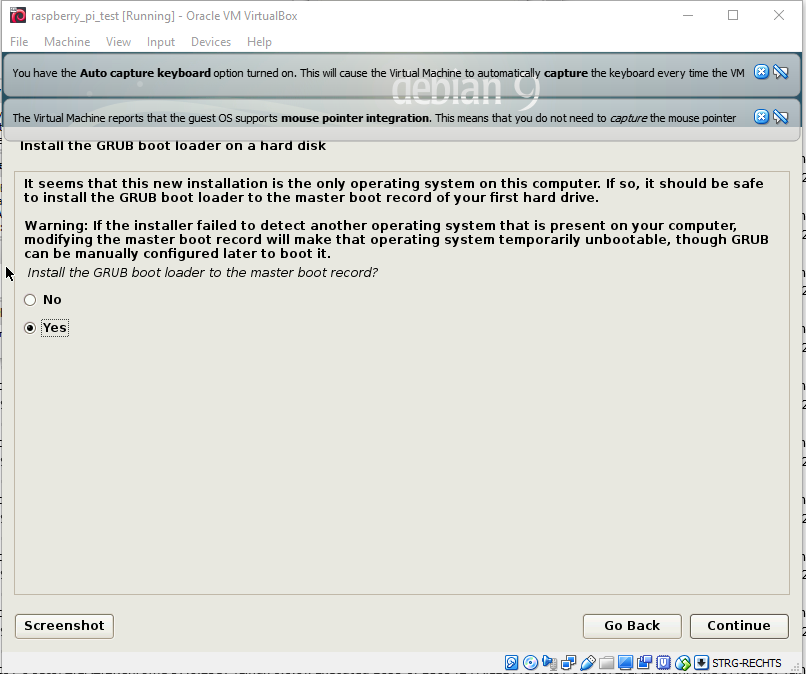
After sometime we see this screen, where we asked to specify the location of our grub-bootloader: we say yes and continue.
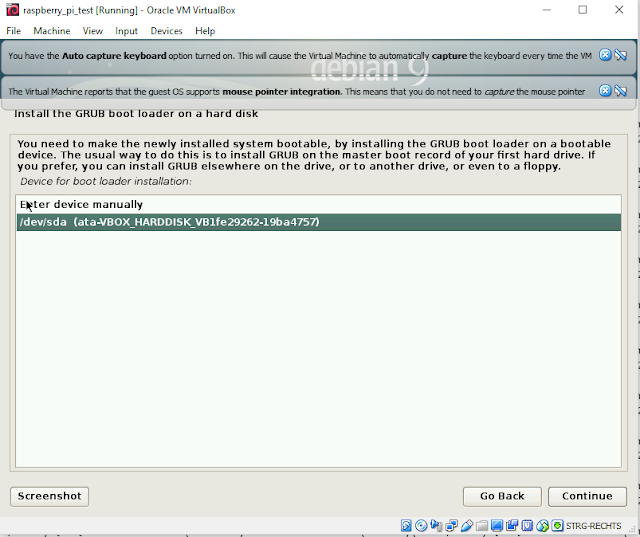
after that, we are asked to select a partion. We choose the our created hdd-drive and press continue. Do not "enter device manually".

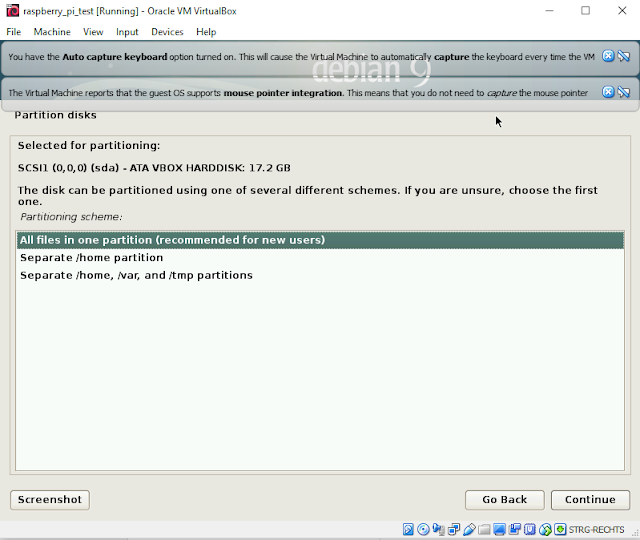
Press continue and after a short time
you see:
The installation is finished. you have installed a virtual raspberry pi.
in the next post we will setup some small things. but for now. its completely usable.
in the next post we will setup some small things. but for now. its completely usable.